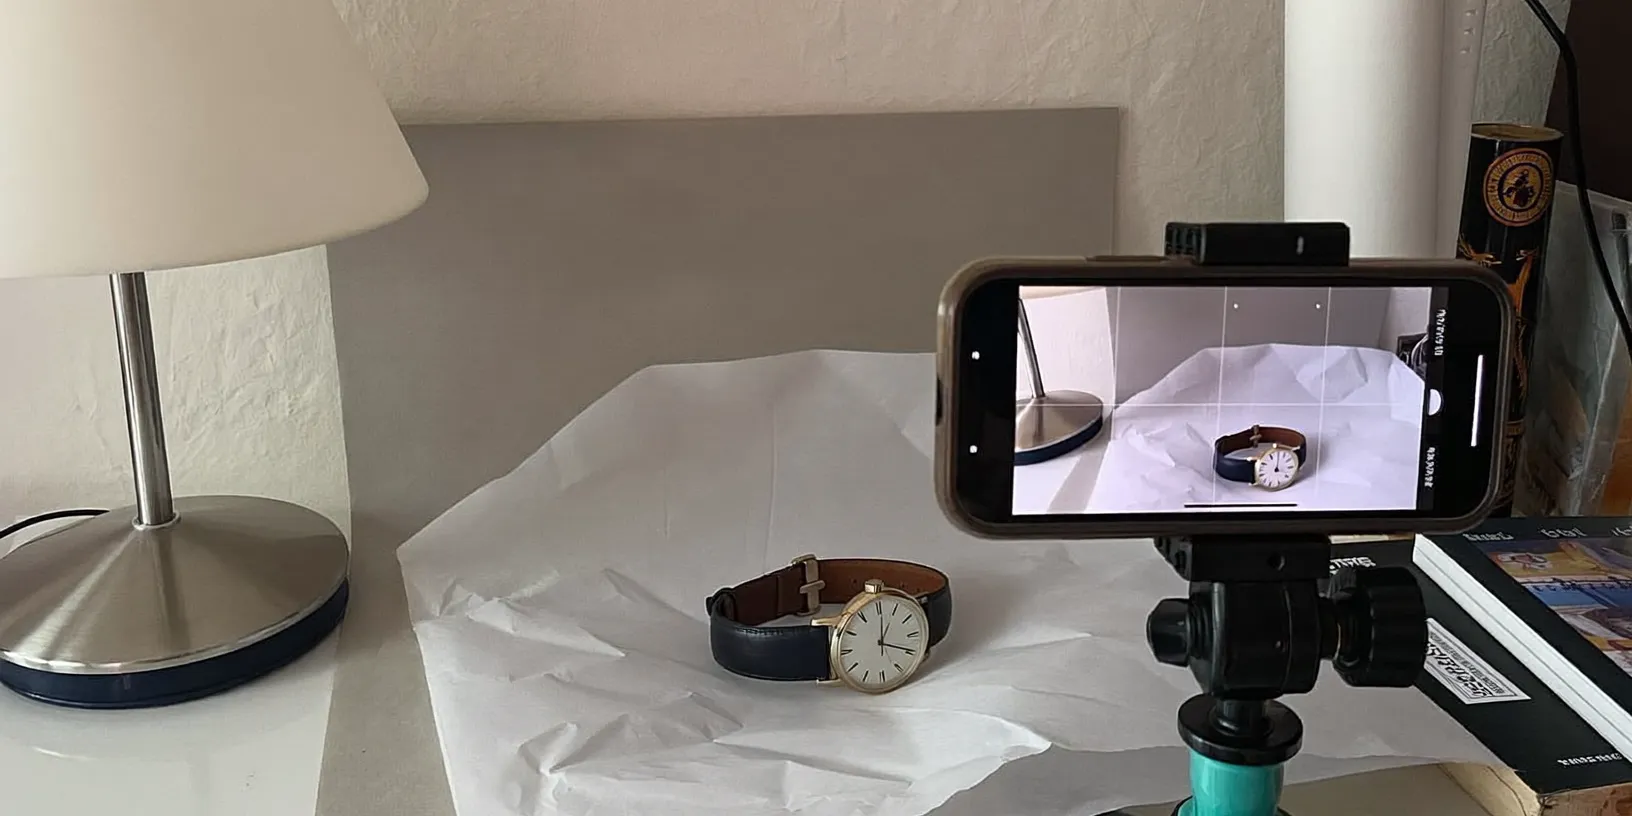
Reflective collectibles fail in photographs for exactly one reason: the light source is visible in the reflection. The watch dial is a mirror, the coin field is a mirror, the display glass is a mirror — and whatever they mirror is what your camera records. Fix where the light sits relative to the lens, and everything else about photographing shiny objects becomes easy. Ignore it, and no amount of expensive gear will save the shot.
This guide is written for a phone camera and household lighting, because that is genuinely all you need. The collectors producing catalog-quality photos of coins and watches are not using better cameras than yours; they are controlling reflections better than you are.
The one principle behind every trick
Imagine the shiny surface as a mirror and ask: what does it see? If it sees the lamp, you get glare. If it sees your ceiling light, you get a hot white blob across the dial. If it sees a large, soft, white surface, the object photographs as bright, clean, and detailed. Every technique below is just a different way of making sure the mirror sees something worth reflecting.
Start by killing the overhead lights. They sit almost directly above the object, which means they reflect almost directly into a camera positioned above the object — the single most common source of ruined dial and coin photos. Work with one light you control instead.
The basic setup for any reflective object
Use one soft light source. A desk lamp aimed through a white bedsheet, a sheet of baking parchment taped over the shade, or simply bouncing the lamp off a white wall all work. Place it off to the side at roughly forty-five degrees to the object — think ten o'clock or two o'clock, not noon. Set the object on a neutral, matte background; a sheet of grey card is ideal because it never reflects a distracting color back into polished surfaces.
Now position the camera slightly above the reflection line rather than dead-on. A few degrees is enough to move the light's reflection out of frame while keeping the object's face fully visible. This tiny adjustment — tilting either the object or the camera two to five degrees — solves the majority of glare problems all by itself.
Watch dials and anything under glass
A watch crystal reflects the entire room, and most of the room is visual clutter. The trick professionals use costs about one dollar: cut a hole in a piece of white card just big enough for the camera lens, and shoot through it, holding the card close to the lens. Now the dial reflects a clean white plane instead of your bookshelves, your hands, and your phone. The same trick rescues framed items, display cases, and slabbed cards — anything trapped behind a reflective layer.
If a stubborn hotspot remains, move the light further off-axis rather than dimming it. Angle beats intensity every time with reflections.
Coins: photographing luster
Coins add a wrinkle: mint luster, the sheen that separates an uncirculated coin from a merely shiny one, only shows when light moves across the surface. In a still photograph, luster appears as a soft band of light — collectors call it the cartwheel — and where that band falls depends on the coin's angle.
So don't chase a single perfect frame. Take several shots, tilting the coin one or two degrees between each, and keep the frame where the luster band crosses the part of the design you want to showcase. Three tilted attempts almost always beat ten static ones. Keep the camera itself square to the coin; tilting the camera distorts the round coin into an oval, while tilting the coin keeps geometry honest.
The two-photo habit that makes a catalog trustworthy
For your records, one beautiful photo is half the job. Take a second frame with the light dropped low, raking across the surface at a shallow angle. Raking light does the opposite of what beauty light does: it exposes everything. Hairline scratches, cleaning marks, rim dings, polishing — all of it jumps out.
The pair together documents condition far better than either photo alone, and it changes the character of your catalog. A record that includes an honest raking-light photo answers the condition question before a buyer, an insurer, or a fellow collector asks it. Years later, it also proves the scratch was already there — or wasn't.
A repeatable routine
Once the setup works, it takes two minutes per object: lamp at forty-five degrees through diffusion, grey card background, camera square and slightly above the reflection line, beauty shot, raking shot, done. Name the files by catalog entry and attach them to the item's record while the object is still on the table.
That last step is the one that pays compound interest. An object photographed once, properly, never has to come out of storage just to answer a question about it — and a collection where every item carries its own evidence is worth more than the same collection as a box of unphotographed mysteries.